Google Ads, also known as Google Adwords is one of the biggest and most effective advertising platforms online. 5.6 billion Google searches are made every day! That’s 63,000 searches per second! This is why Google Ads are an amazingly effective way to get your website in front of millions of potential customers.
If you’re looking for the best ‘bang for your buck’ when buying traffic, Google seems to be the most logical place to start your advertising efforts.
It’s really not that hard to get started with Google Ads, but with little experience, it can seem overwhelming. This is precisely why I’m going to walk you through 7 steps to set up a Google ads campaign. These steps are highly effective, even if it’s your first time ever using the Google ads platform.
Table of Contents
Step #1: Go to the Google Ads Website & Campaign Goals
You can start by going to the official Google Ads website. Next, you will then see a button or call to action that says, “Start Now.” Click the button to sign up for your very own Google Ads account. You can then choose a goal that is relevant to your marketing goals such as Sales, Leads, Website traffic, Product and brand consideration, Brand awareness and reach or App promotion.
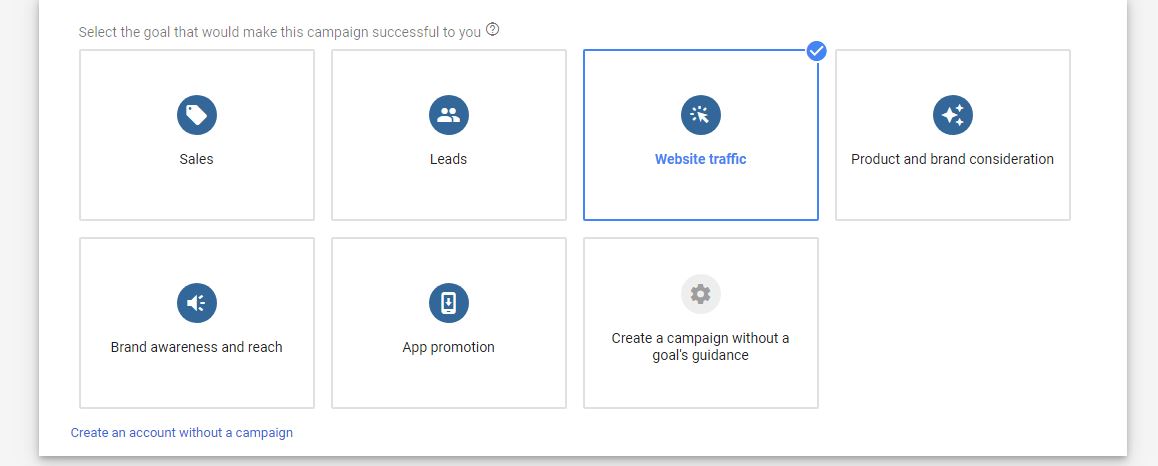
Choose the campaign type that best fits your advertising needs. If you are completely brand new to Google Ads, I suggest selecting “Website Traffic” until you get comfortable using the Google Ads traffic platform.
Step #2: Choose a Campaign Type and Specify a Domain
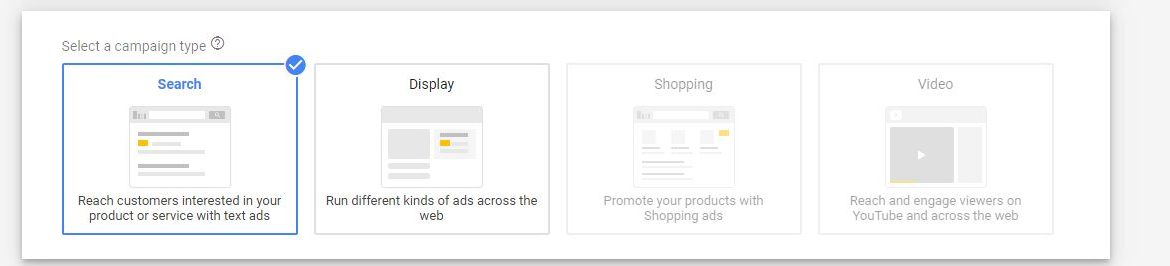
At this point you will have two options for a campaign type. Since you’re just getting started, I recommend that you choose “Search”. Google Display Network or GDN is also a highly effective means of advertising but can be slightly more difficult to implement than basic “Search” campaigns. For the time being, let’s focus on ‘Search’.
Next you will be prompted to enter your domain name or the website address that you would like to promote. You may want to choose a name that has to do with the product or service you’re advertising.

As you can see, I entered the domain “dayjobhacks.com” as the website that I would like to promote.
Step #3: Select Campaign Name, Locations & Languages
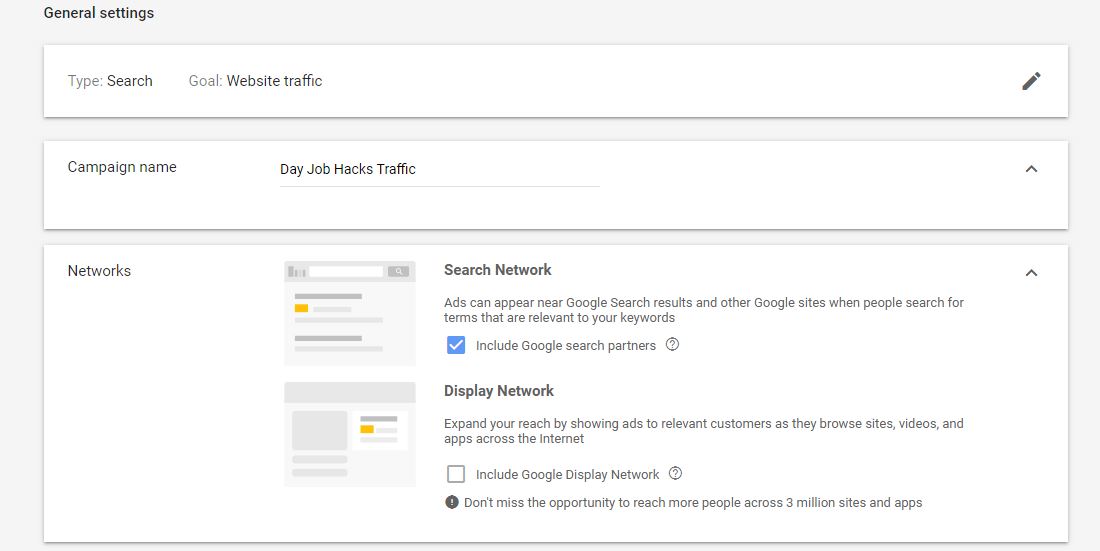
In this step you will have to name your campaign. It is recommend that you name it something similar to your website name and goals. This will help you stay organized as you create future campaigns within Google Ads.
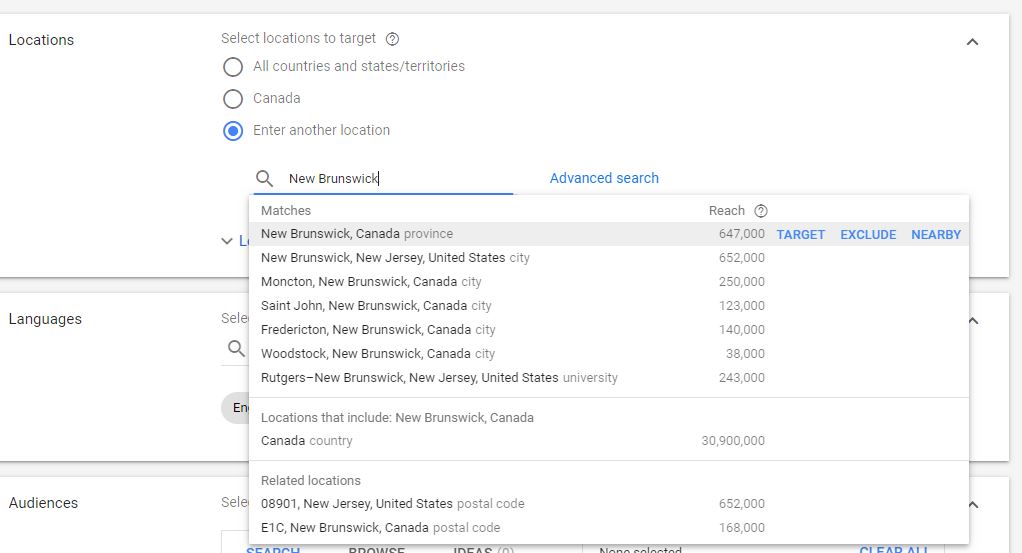
The next thing we need to consider is the location of your audience. You have great flexibility when it comes to people’s locations. You can choose a very large area or even a small area. For example, you could choose an entire country or just merely a small city. This will be determined by your marketing goals and the services being offered.
If you are creating a simple blog and would like to get more traffic, it’s a good idea to target entire countries or even North America since the traffic will be cheaper. If you own a small business that services a local area, it’s best to target those within your geographic area only.
Now it’s time to choose languages. This will typically be the main language used on your landing pages. In most cases, if you’re targeted a location within North America, you will choose English.

Step #4: Set Your Daily Budget
Until you are experienced with Google Ads, it’s best to start with a low daily budget. This will allow you to start slow and gather data. Once you start to see some traction and progress, you can then expand on what’s working for you as you become more familiar with Google Ad campaigns.
Understand that Google Ads typically will go slightly over your daily budget. For this reason, it’s extremely important to closely monitor your campaigns so you do not exceed your maximum weekly or monthly advertising budget.
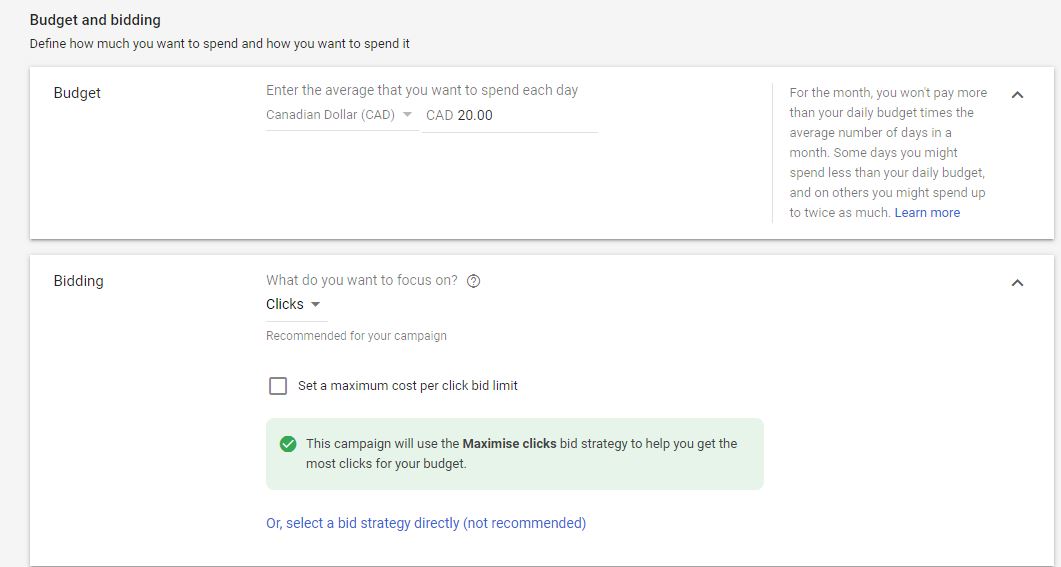
I recommend starting with $20 per day until you get the hang of Google Ads. You will also have to choose how Google Ads will bill you for the traffic. Until you define more advanced marketing goals, paying per ‘click’ is typically the best option.
Step #5: Add Ad Groups & Keywords
This can seem difficult, especially for first time Google Ads users. You should always take advantage of Ad Groups as this allows you to separate keywords into categories. The purpose of this is so you can create unique ads that are more relevant to keywords. Sometimes keywords tend to be more specific than others. Grouping all keywords into a specific ad group limits your ability to create unique ads for each group of keywords.
Your first instinct is to add as many keywords as possible so you can get lots of traffic. This isn’t an effective means of advertising when first starting out with a limited budget ($20). That budget will be spread across the keywords you choose.
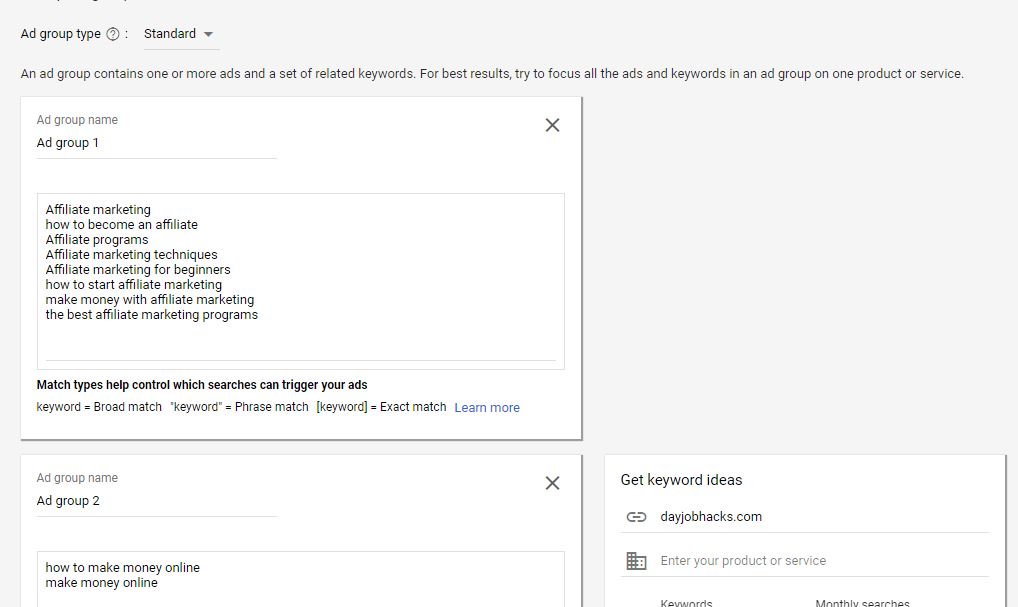
Too many keywords with a small budget means that your data will be spread extremely thin and you may end up with 1 click per keyword. From a data perspective, this is a nightmare as you have so little data for each keyword that you have no idea on how they actually perform. Start with no more than 40 keywords on a $20 budget. You can categorize these into 2 or 3 Ad Groups based on relevance.
Step #6: Create Your Ads
We’re almost done! This is where you will have to use some creativity. The goal is to create an ad that describes your website and will attract your consumers. Above all else, you want them to be enticed to click your ads.
However, you also want to provide accurate information related to your site (no click bait). Users are more likely to click on an ad that has the keyword they used in their Google search.
This is another reason why Ad Groups are important. So, if you have keywords that are similar, it’s good to group them together so that you can use the common keyword within your headline.
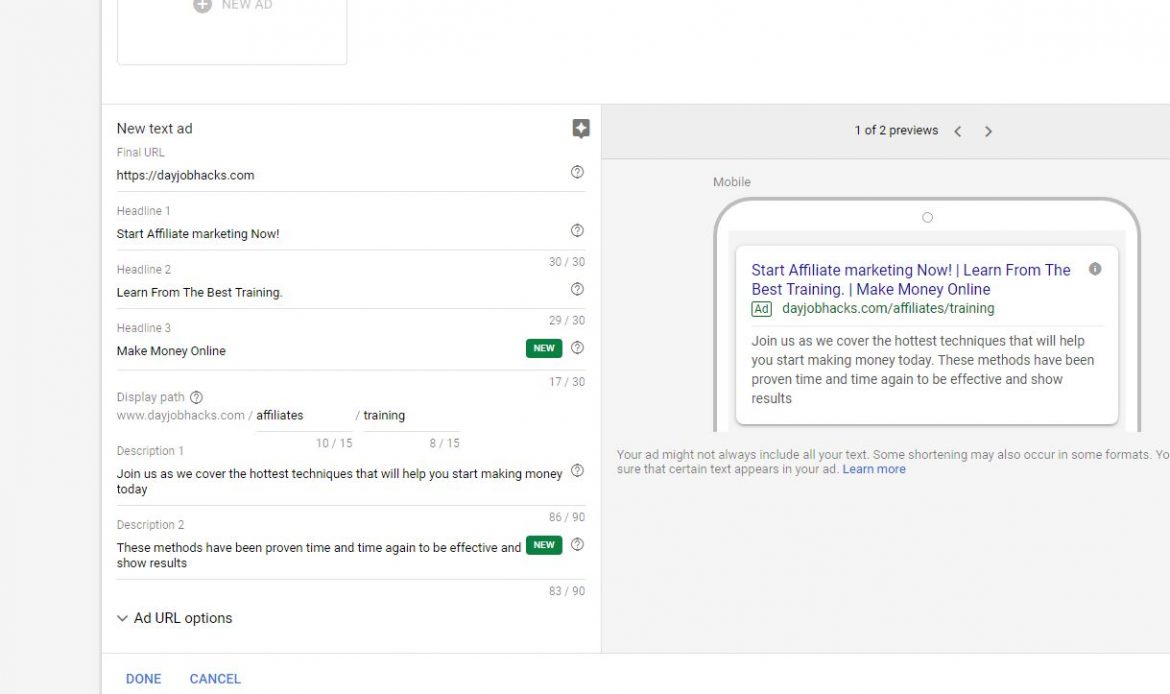
After you’re finished with the headlines, you can move to the ad descriptions. This is where you will focus on the details and selling points of your website or service.
It’s recommended that you create a minimum of 5 ads to start. Be sure to test different angles and catch phrases in order to find the highest converting ad that has the best click through rate possible.
Step #7: Specify Your Billing Details
The final step is to setup your billing details and preferences. Select your billing country (your currency), time zone and take advantage of the “Introductory offer”.
There are plenty of Google ads coupons online that will give you FREE advertising credit. These coupons typically only apply to new accounts, so take advantage of this now because you may not have the option in the future.
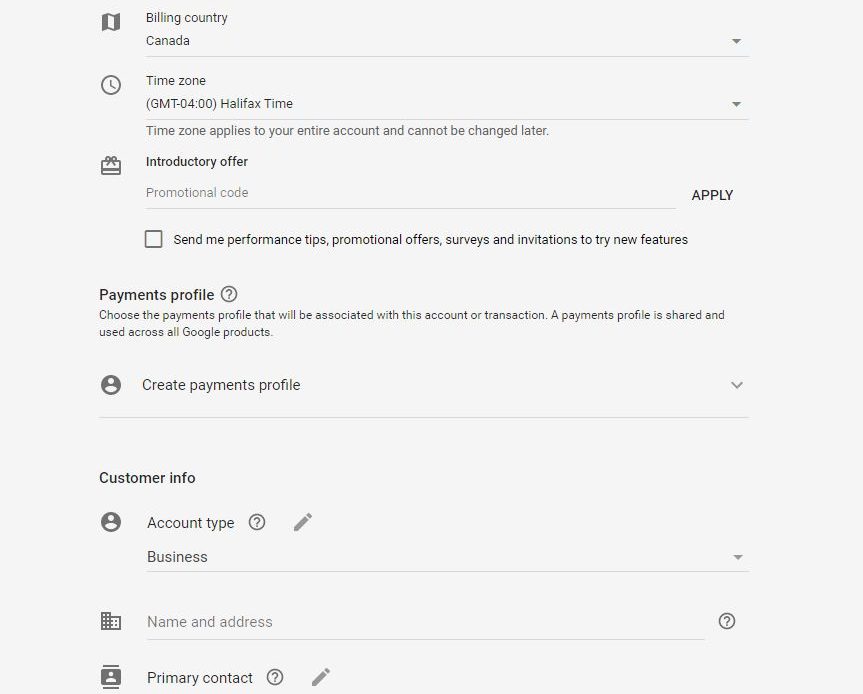
Enter your account type as business or individual. Chances are if you are just beginning, you will want to select “individual”. Enter your billing address and payment method details (Credit card #).
Agree the the Google Ads terms and conditions and click submit to complete the process.
Tracking Data, Optimizing and Scaling
As you begin to get traffic to your website, it’s extremely important to track the data associated with your campaign. This can be done with a number of methods including third party tools such as Bemob or CPVLab Pro. This is crucial to the success of your campaign. You can also use Google Ads pixel to track your progress directly inside your Google Ads dashboard (recommended).
Determining which keywords are working for you and which need to be paused will allow you to optimize your campaign and get the most out of your campaign budget. Not all keywords will produce results. In fact, most keywords will not yield any results. This is why its imperative that you track your progress along with way.
Once you have determined which ads, ad groups and keywords are producing results and creating a return on your ad spend, it’s time to focus your budget on those winners.
It’s always a good idea to test new keywords and ads regularly so that you can find more winners as you increase your daily ad budget.
Did You Enjoy This Article?
If you found this article useful, we highly recommend that you check out the following:
Top 5 Best Affiliate Marketing Programs For Beginners
What is the Typical Affiliate Marketing Salary? (The TRUTH)
3 Fool Proof Affiliate Marketing Amazon Strategies To Make Money Online
3 Easy Affiliate Marketing Clickbank Strategies That Will Make You Money

- How to Make $1000 a Day With Google Ads Affiliate Marketing – Ultimate Guide - October 10, 2023
- Ultimate Guide to YouTube Shorts Ads for Affiliate Marketing - December 23, 2022
- How To Start Affiliate Marketing For Beginners [Ultimate Guide 2023] - December 21, 2022