Revcontent is one of the many native ads platforms for CPA affiliates that allows aggressive advertising. With over 250 billion ad views per month on their network, it’s easy to see that advertising with Revcontent has become a very scalable option for affiliates.
One of their more fierce competitors is MGID – which offers you up to a $1250 signup bonus on your first deposit. I have had awesome results on MGID using this same method!
Revcontent claims to have reached 97% of US households and has some of the biggest websites online as publishers.
Native ads can offer cheap clicks but can be difficult even for advanced marketers to get positive ROI.
In this article, we will cover easy steps to get started with a Revcontent campaign. First, let’s take a look at the basics.
Table of Contents
What Are Native Ads?
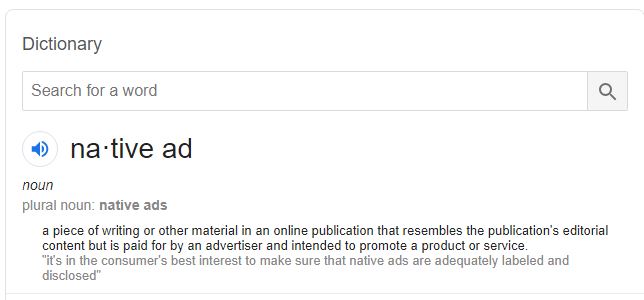
According to Google, Native ads are a piece of writing or other material in an online publication that resembles the publication’s editorial content but is paid for by an advertiser and intended to promote a product or service.
What this means is that they are advertisements that are often disguised as everyday content articles.
This creates an illusion for the reader that they are accessing an article to read instead of a paid publication. This is the main reason that Native ads are extremely effective. The users typically draw a mental line between advertisements and valuable content. Native ads blur this line which allows the users to engage with the ads without immediately realizing they are doing so.
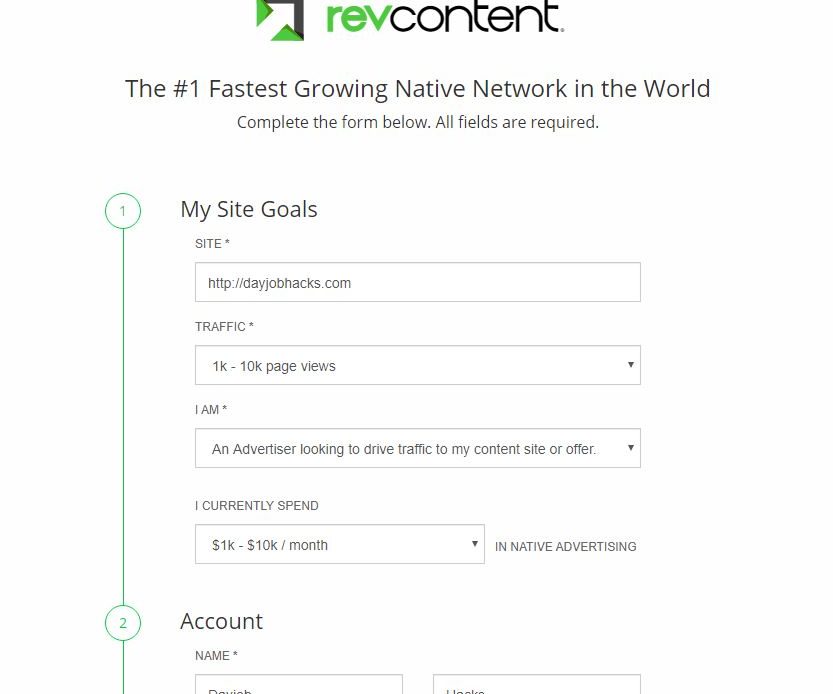
Step 1 – Create a Revcontent Account
Let’s start by going to the Revcontent official website. Now click signup at the top of the home page.

Next you will have to fill out your information including your website details and your personal information. Once you have completed all the required information, click the box to agree to their terms and conditions and register.
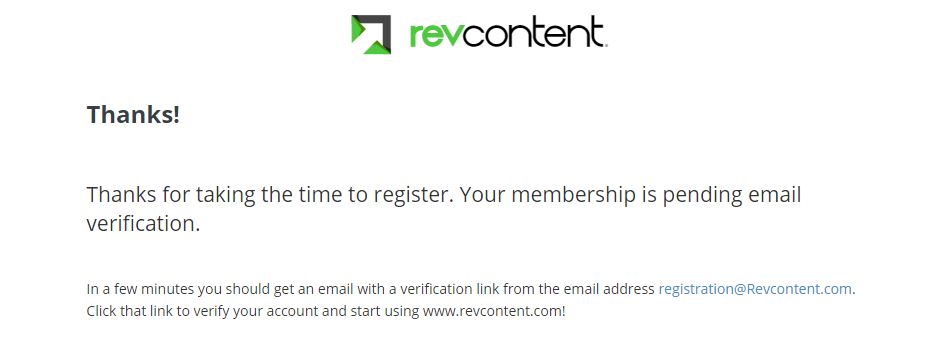
You will now be prompted to verify your membership via email. An email will be delivered to the address you provided during the registration.
While you are waiting for the registration email, we can focus on which campaign you will promote on Revcontent. There are many different types of campaigns that are working and profitable on Revcontent.
The best way to find a campaign worth running is to use some form of an affiliate spy tool. The most well known tool for this is Adplexity.
Step 2 – Finding an Affiliate Campaign To Promote on Revcontent
Start by heading over to Adplexity.
This tool is great for finding working campaigns across multiple native ads networks. A rule of thumb is that if a campaign is working on one native ad network such as MGID, it will usually work on Revcontent. Take some time and search through some of the ads on the spy tool until you find a campaign that is worth running.
A good tip is to focus on CPA offers or lead generation. Maxbounty has hundreds of lead generation affiliate offers to choose from. You may have to cross-reference what is available on Maxbounty and match them with the campaigns you see within Adplexity.
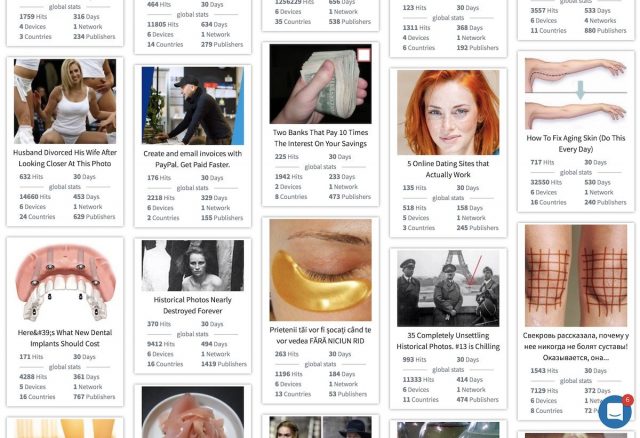
There are some evergreen niches that have been profitable for years on native ad networks. These include weight loss, diabetes, muscle, skin care, crypto or investing offers, and male enhancement. For the purposes of this article, I will choose the weight loss niche.
Search Adplexity for the term “Fat” and check out the results. Here is a video I did that goes more in depth.
As you can see, there are thousands of ads for weight loss across many different native ad networks. Take some time to save some of these images to your computer. Adplexity also lets you download the landing pages! While you might have to pay for Adplexity – really One winning campaign and landing page is worth the price and you can download unlimited campaigns.
Also take note of the ad text as we will be using these in future steps. Copy a minimum of 5 unique ads to test on the Revcontent network.
The whole idea is to test different angles to see which works the best. Make sure your ads are completely unique in order to get proper test data across the ads. If you choose 5 of the same or similar ads, chances are they will all fail and you will waste some of your ad budget.
Another great thing about this spy tool is that it will allow you to also search affiliate networks and advertiser links so you can see all the campaigns one affiliate or offer owner is running. You will notice that many people are running more than one landing page.
Find at least 3 different landing pages to test.
Keep in mind that these landing pages will need to be uploaded to your web host on a domain that you have already purchased.
Here is a great example of a landing page that is perfect for VSL-style (video sales letter) affiliate offers.

Before moving on to the next step, you should have already…
- Copied down 5 images and ad copies
- Downloaded 5 landing pages
- Found a relevant VSL offer on Clickbank related to your ad copies and landing pages
Step 3 – Setup Tracking For Your Revcontent Campaign
This is a very crucial step for anyone running any type of campaign on Revcontent. Without a click tracker, you will have no way of capturing relevant data for your campaign. Revcontent placements are tracked by something called “Widget ID’s”. Each widget ID represents a specific placement on a website. Most widget ID’s will not lead to conversions but you will find some that contain high-quality traffic.
Without a click tracker, it’s harder to determine which widget id’s are good and which are bad since the click tracker allows you to see more data like landing page CTR and all device/location info.
If you are not completely sure which click tracker to use I recommend CPV Lab Pro.
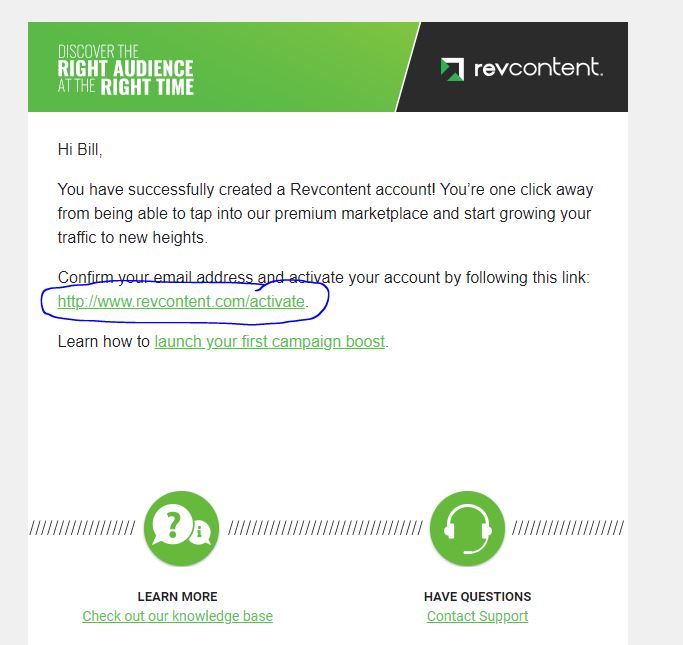
Step 4 – Revcontent Account Activation and Payment Method
At this point you should have already received your confirmation email for your Revcontent account. Follow the instructions in the email to activate your account
Once you have activate your account, you will be promoted to login and provide your payment method details.
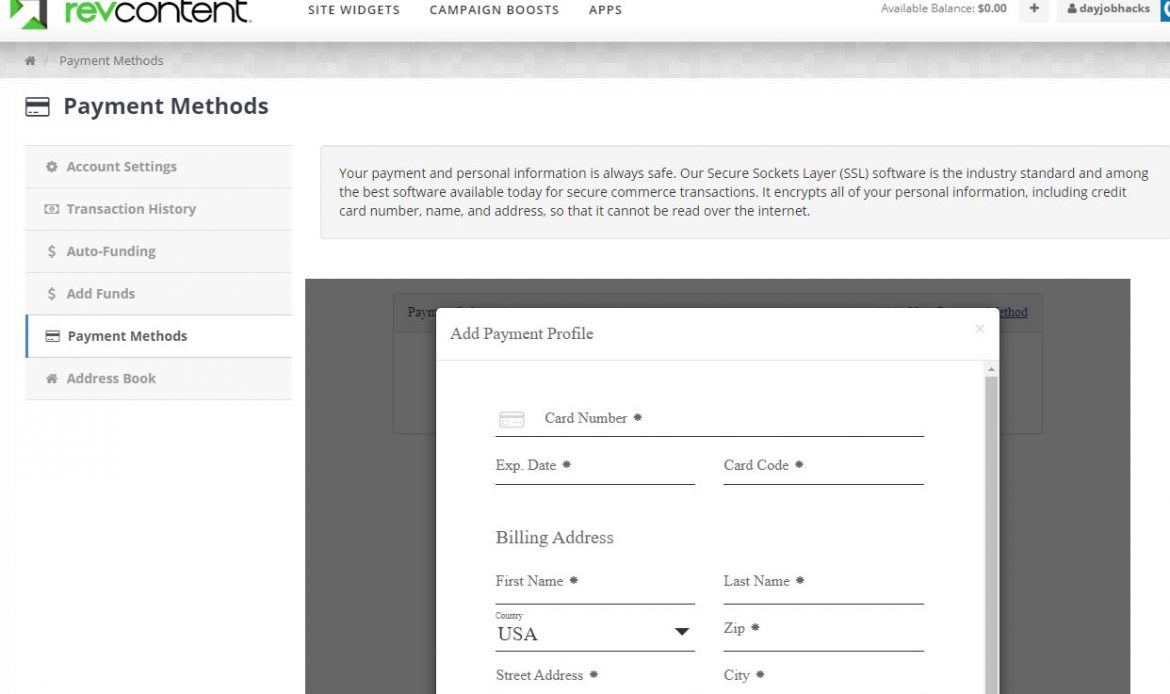
Once you have added your payment method and billing details, you are now ready to create your first Revcontent Campaign.
Step 5 – Creating Your First Revcontent Campaign Boost
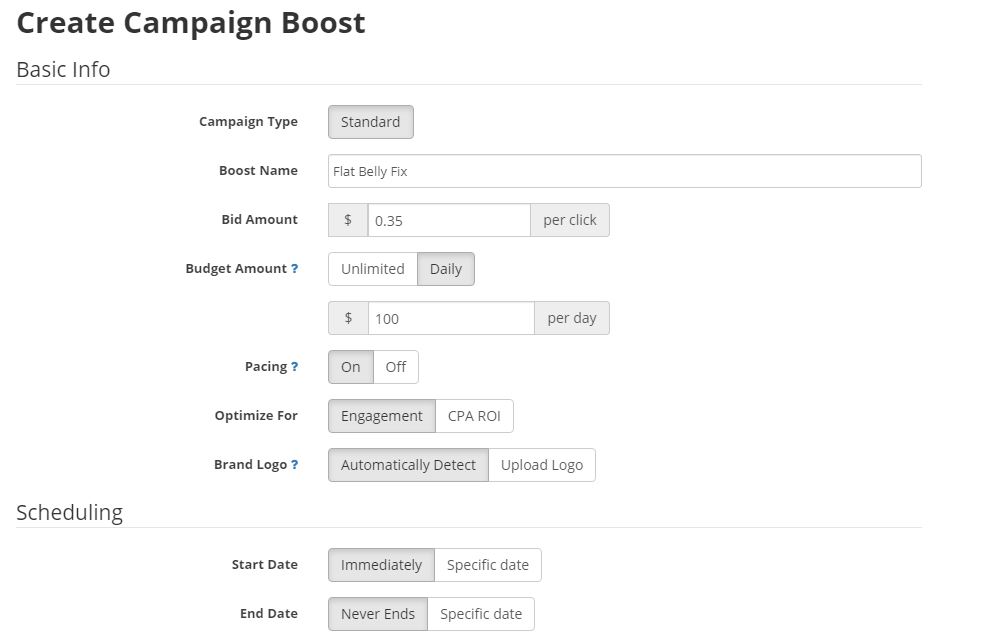
Now that you have all your ad copies and landing pages, and added your payment method and billing information, it’s time to create your first Revcontent campaign. Click “Campaign Boosts” from the menu at the top of the page.

Next, you will see the campaign settings page. On this page you will define the parameters and settings for your campaign boost. Enter the following information:
- Boost Name – Create a name for your campaign
- Bid Amount – This is the maximum bid per click for your campaign. I recommend leaving this at the default value for your first campaign.
- Budget Amount – Choose daily budget and enter $100 for your first campaign
- Pacing – Set this ON so your budget is spent equally across the day. Otherwise your campaign will spend your budget as fast as possible.
- Optimize For – Set this to Engagement until you are more comfortable using pixels within’ your campaign.
- Start Date – Set to Immediately
- End Date – Set to Never Ends
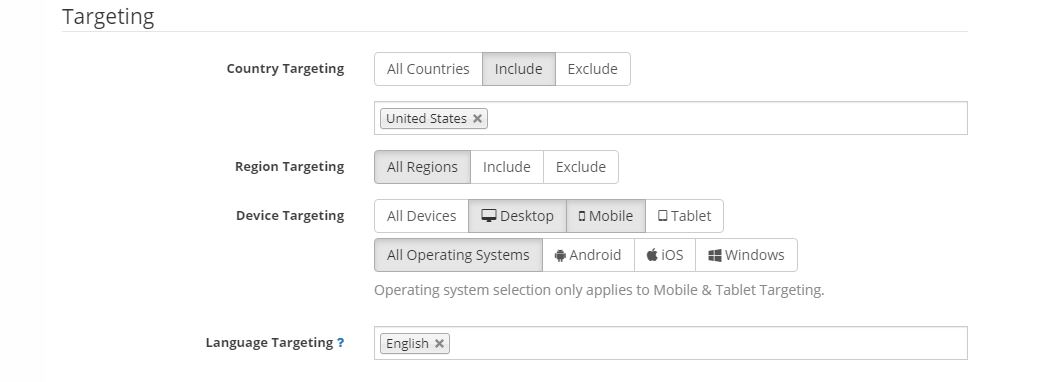
The next section of the settings page that we will focus on is the Targeting section. Enter the following information:
- Country Targeting – Choose the country you wish to target
- Region Targeting – Select the region or all
- Device Targeting – Choose either Mobile or Desktop. It is not a good idea to target all devices within a single Revcontent campaign. You will either bid too low for Desktop traffic or you will over pay for Mobile traffic. Break these devices out into their own campaign. Also choose All Operating Systems unless your offer only accepts particular OS versions
- Language Targeting – Select the language that you wish to target.
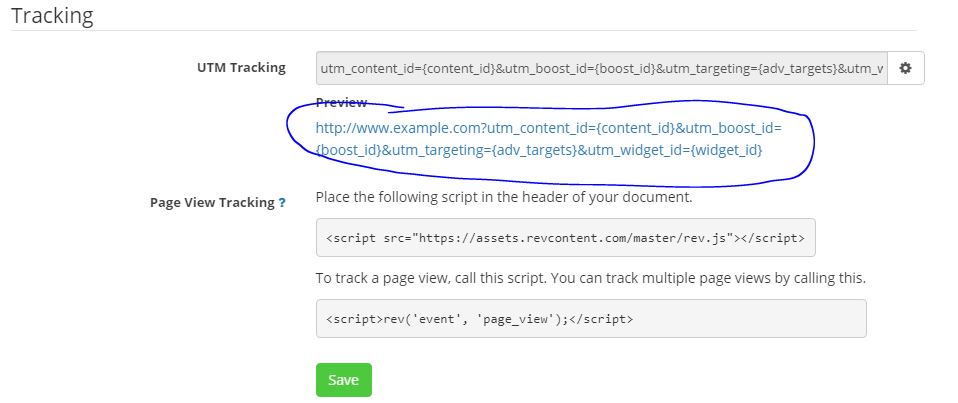
In the next section, we will focus on campaign tracking. We will have to enable some UTM tracking elements so that you will be able to pass important campaign data to your click tracker such as widget ID. Click the gear next to the UTM tracking field.
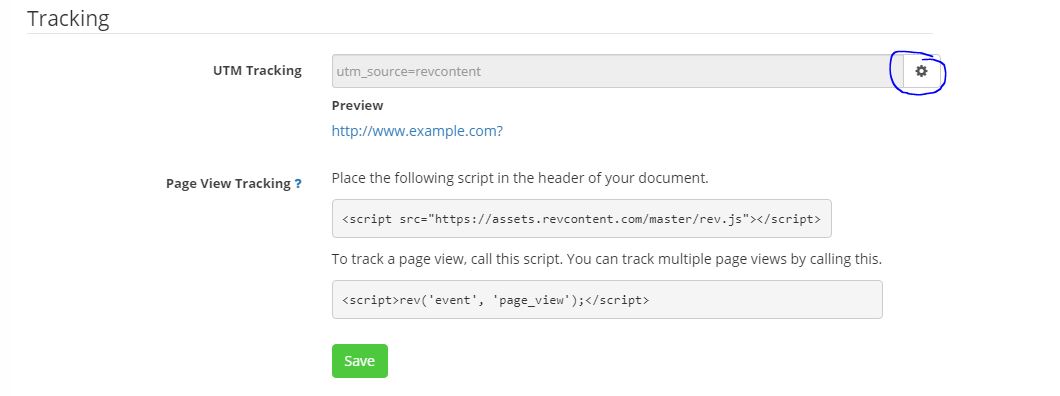
Next you will see the UTM tracking menu. Click the following boxes and then click “Build Tracking Code”.
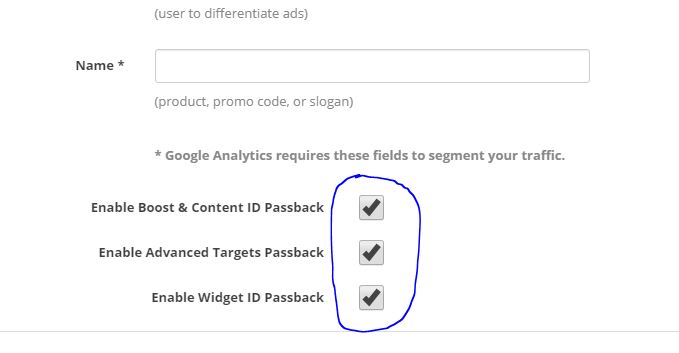
If you have done this correctly, you will see a preview link that will include the UTM parameters that you have just enabled.
Click the Save button.
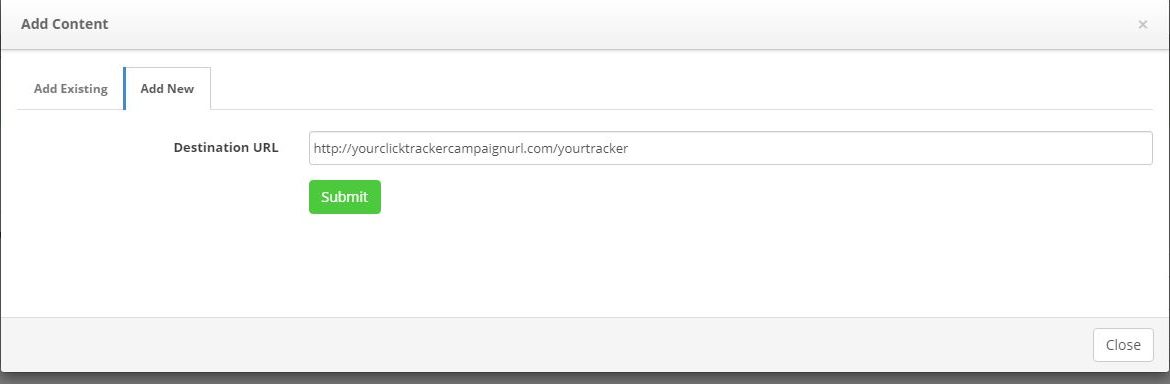
Step 6 – Creating Your Revcontent Ads
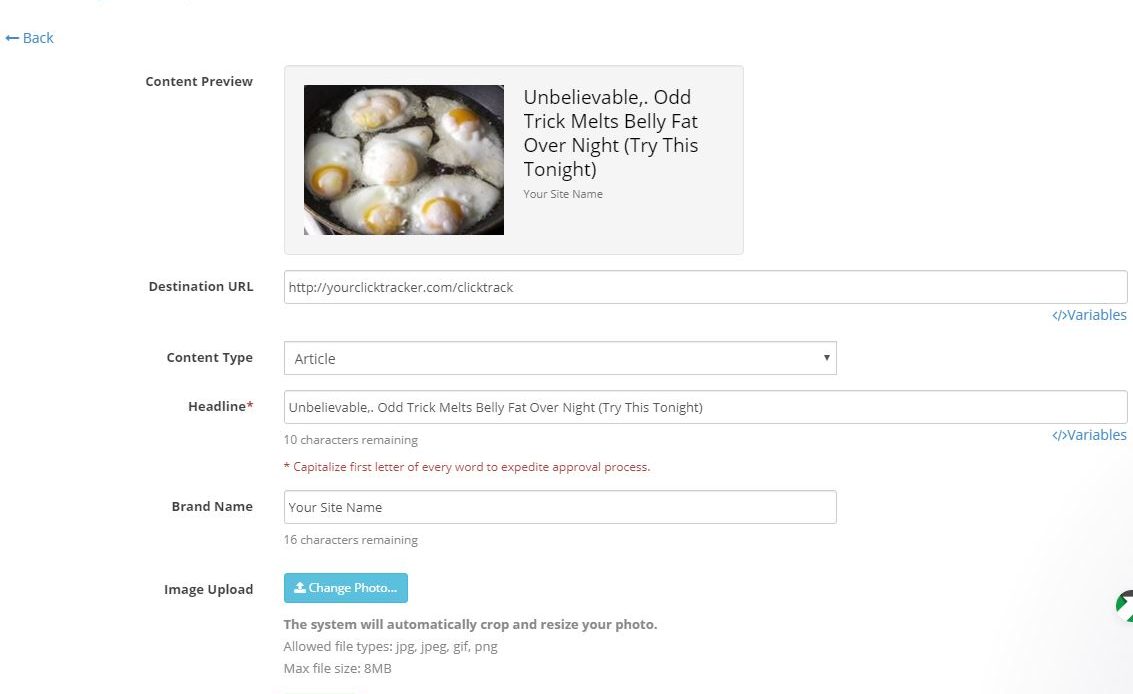
Now that you have specified your campaign settings and parameters, it’s time to create your campaign ads. Click ‘Add New’ from the content creation window. Enter the URL provided to you by your click tracking platform.
This is the URL that you will use to track all campaign data. (We have a complete case study and video step-by-step on how to set this up with a click tracker inside Powerhouse Affiliate.
Next you will be prompted to add your content details. Add the following information:
- Headline – Use the headline that you found within your spy tool search
- Brand Name – Use the domain name for your landing pages
- Image Upload – Upload the ad images that you saved from your spy tool search
Click Submit once you have added all the required information.
Repeat these steps until you have added all 5 ad copies that you found from your spy tool search. It is important to properly test different images and ad copies like I mentioned earlier in this article.
Once you have added all 5 ad copies as content for your Revcontent campaign, you will notice that your ads are in a pending status. It can take some time for your ads to be approved. If you wish to expedite this process, contact your Revcontent account manager and request approval. This almost always speeds up your approval time.
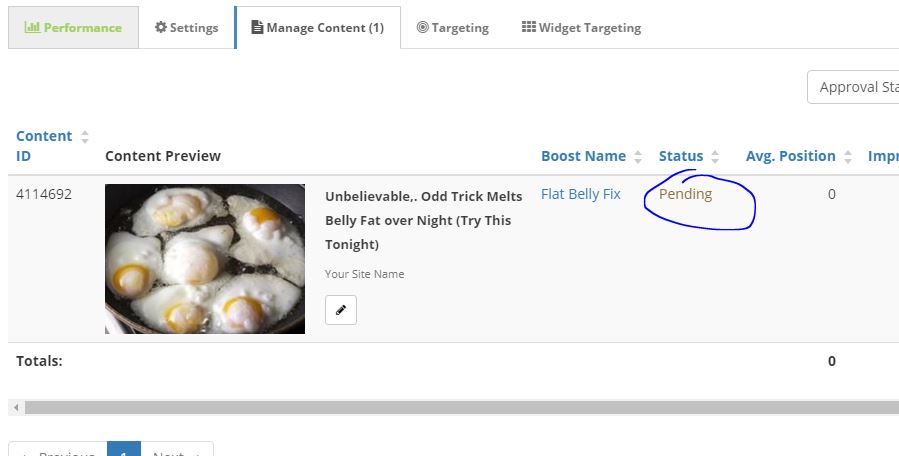
Do not skip this step. You may wait up to a full week before you are given approval otherwise. You account manager can help your ad approval time, in some cases the same day.
Congratulations! You have created your first Revcontent campaign. Be sure to keep a close eye on your click tracker data to determine which ads, landing pages and widget ID’s are performing.
As I mentioned we recently completed a full case study showing all of the data and profitable ads and landing pages that are working now on Revcontent. It shows a campaign that you can scale into many different countries.
If you want to see it and all the data, as well as get access to all the landing pages and video instructions then join Powerhouse Premium, and navigate to the Case studies section.
Also if you want more pointers on how to crush native watch this video and subscribe to the Youtube Channel by clicking here.
Did You Enjoy This Revcontent Article? Please comment or ask questions thanks.

- How to Make $1000 a Day With Google Ads Affiliate Marketing – Ultimate Guide - October 10, 2023
- Ultimate Guide to YouTube Shorts Ads for Affiliate Marketing - December 23, 2022
- How To Start Affiliate Marketing For Beginners [Ultimate Guide 2023] - December 21, 2022

hi did provide tutorial training on revcontent and other traffic network , not interesting on facebook thank you
There is lots of training on native inside this Affiliate Marketing Training
Thanks for the tutorial on how to create first native ad but you don’t mention that all the images and landing pages is need to be uploaded to my own website or only in the revcontent and let the revcontent to choose which the best.
Hi you need to set up landing pages on your own server. Here is a guide on that https://powerhouseaffiliate.com/action-plan