In this post, I’m going to show you how to build a squeeze page, also known as an opt-in page. This can be done in as little as ten minutes, and by the end of it, you’ll have a page ready to gather emails. Then you can start building a decent email list by using these methods and and turning those into sales.
While showing you a campaign I’m building, I’ll run you through the five easy steps in the process. This particular squeeze page is in the pain relief niche, and we’re going to be promoting a ClickBank product in the back end of the funnel. We’ll be building the page in WordPress, and I’ll show you all the tools I use to create this.
If you don’t know how to build a website, then please start with our free training so you can learn how to build a cash-ready affiliate marketing website within minutes.
Table of Contents
Some Basics Before We Start
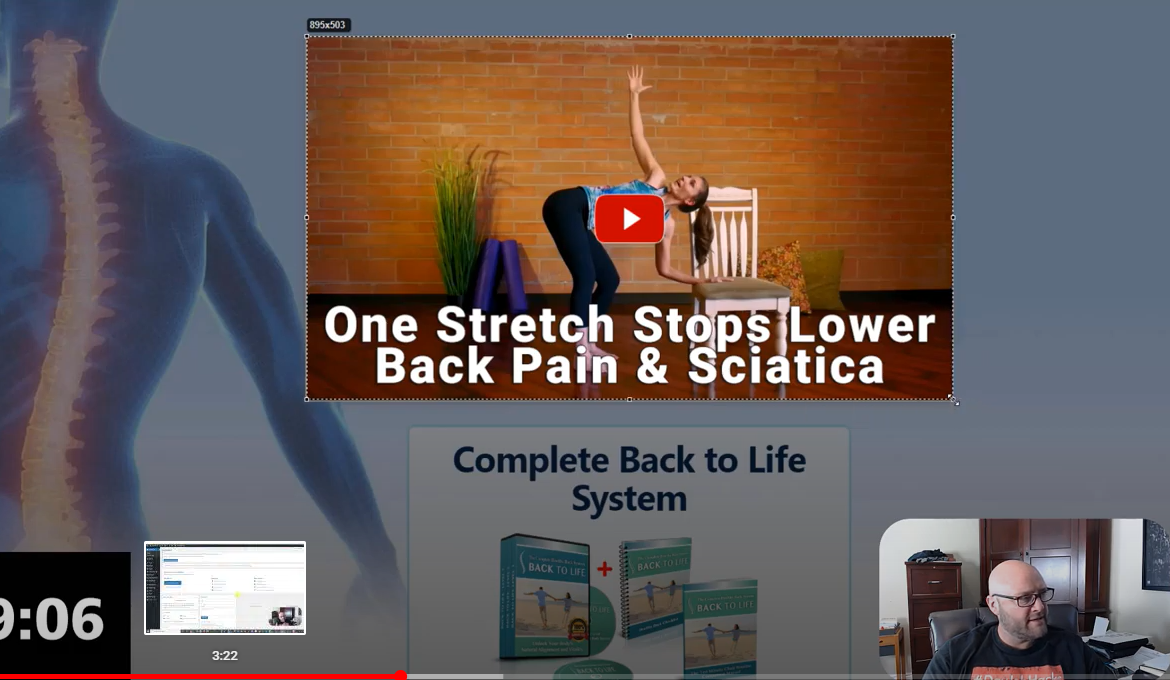
How do these squeeze pages work with ClickBank? What we’re going to look for in ClickBank for this tutorial is a video sales letter. When customers go there, they are shown a video and at any point, they can purchase the product. What we want to do on the squeeze page we’re going to create, is tell people that they can watch a free video. That is the freebie, the giveaway. Customers are going to watch a video about back pain in this case, and we’re going to get their email address in the process.
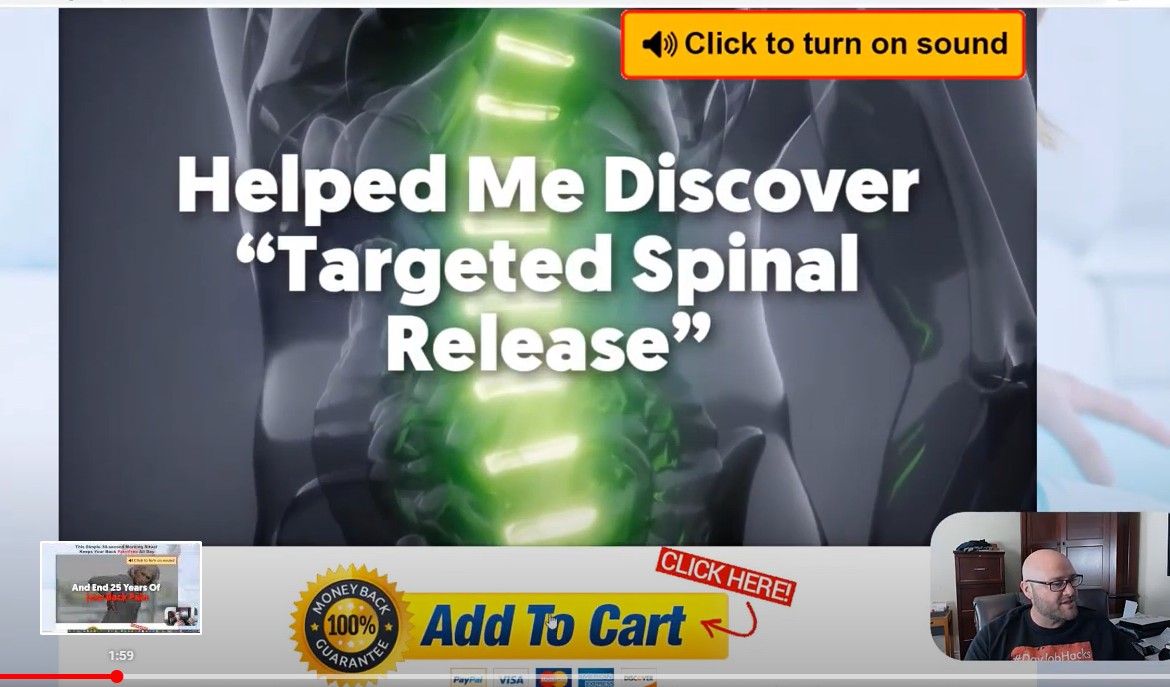
So the trick here (or my method), is that we’re going to create a page that looks like they’re going to be watching the video. But when they click on it, it’s going to ask them to enter their email first. Once they enter their email, then they’ll be directed to the video. So we’re basically creating a step in the middle in which we’ll be acquiring something for our benefit. In this case, an email address.
Tools Needed to Follow this Tutorial
For this squeeze page, we’ll be using some free tools and some paid ones. Don’t worry, though – everything is very low-budget and beginner-friendly.
The creation of the page will be done using WordPress. If you aren’t sure how to set up a website using WordPress, please go to our free training at Powerhouse Affiliate. You will learn how to build a fully functional, cash-ready website in 60 minutes or less.
For the plugins, first, you’ll need a landing page builder, and we’ll use the one called OptimizePress. It’s a paid plugin, but it is one of the best landing page builders because it lets you build them within minutes. I highly recommend it.
Then, you’ll need an autoresponder plugin, and I recommend AWeber because it’s free, and it’s great. I use it for all of my email lists.
Now that we have all the tools, let’s start building the page!
Choosing our Product
Inside ClickBank, we’re going to be promoting a product in the health and fitness category for this example. I find it to be a good and profitable category.
If we go into the marketplace, we can find multiple products inside. We’ll select remedies, as that’s what we’re doing this time around. Once we click there, there are a ton of products that can be promoted and will be listed. A lot of these have high gravity, so if we sort them by gravity, we can see which are the most popular ones.
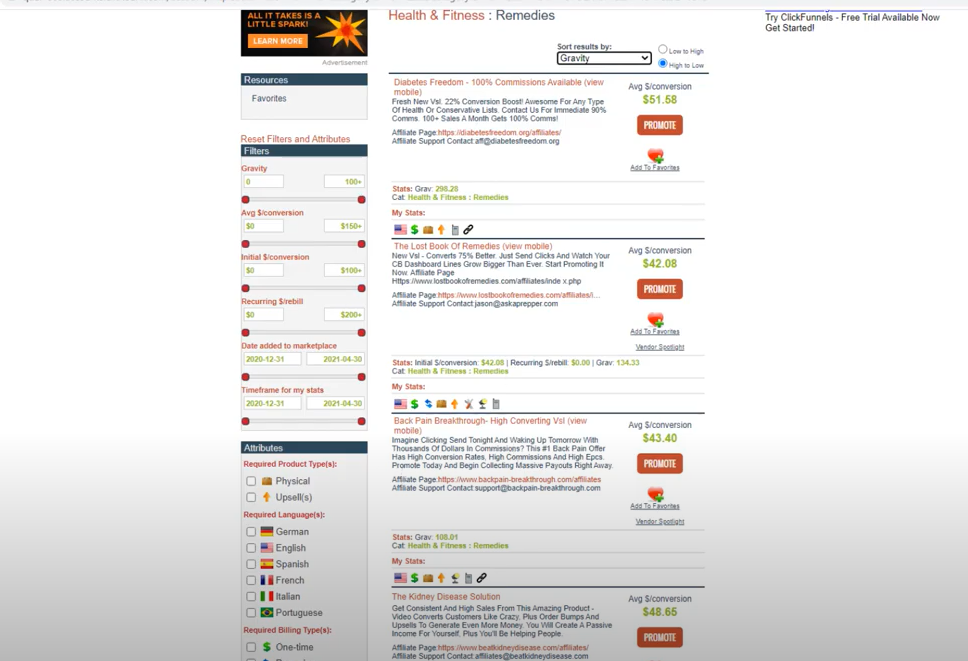
I’m going to select the one we’ll run with, which is the back pain breakthrough— high converting video sales letter.
Setting up the Plugins
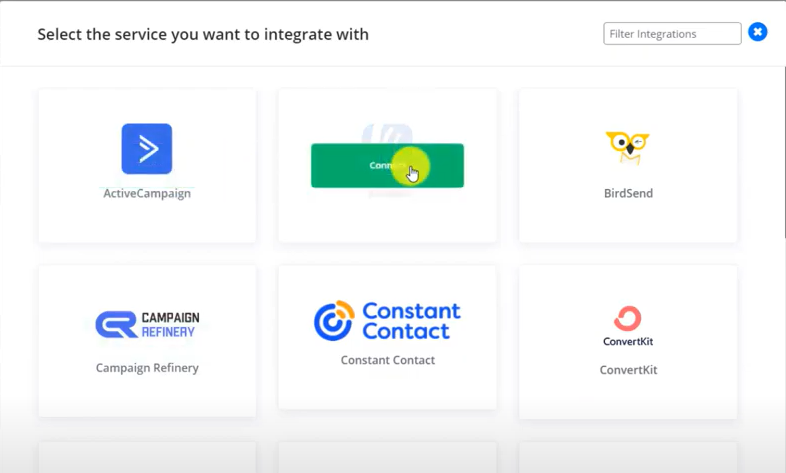
Once we’ve picked our product, we can go into WordPress and select the OptimizePress plugin as explained above. The first thing we’re going to do here is to integrate the AWeber autoresponder into it. By clicking into the menu on OptimizePress and going into integrations, you can do that in a simple step.
Once we integrate it, we log in to our AWeber to allow it to access.
And now, every time somebody enters an email on our website, it’s going to go into the autoresponder, easy as that. There are lots of other things we can integrate with OptimizePress, which is why it’s such a great tool. But for this tutorial, AWeber is all we need.
Finding a Template and Customizing It
Inside OptimizePress, we’ll select ‘create a new page’, then select ‘landing pages’ on the top menu, and look for a template. I recommend finding a template with a video on it. Once we select it, it’ll ask us to name the page, and then we click ‘create page’.
Once the OptimizePress editor is opened, we’re good to go. First, at the top, we want to edit the logo. If we have a logo, we can replace it, and if not, then we just remove this whole section—which is what I’m doing in this example.
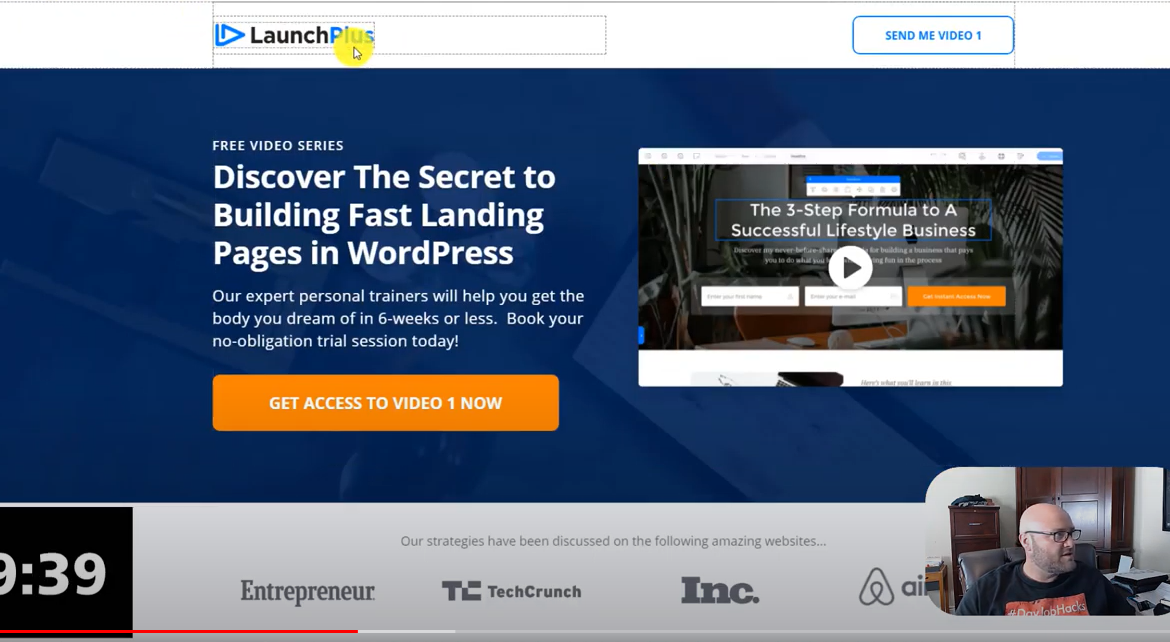
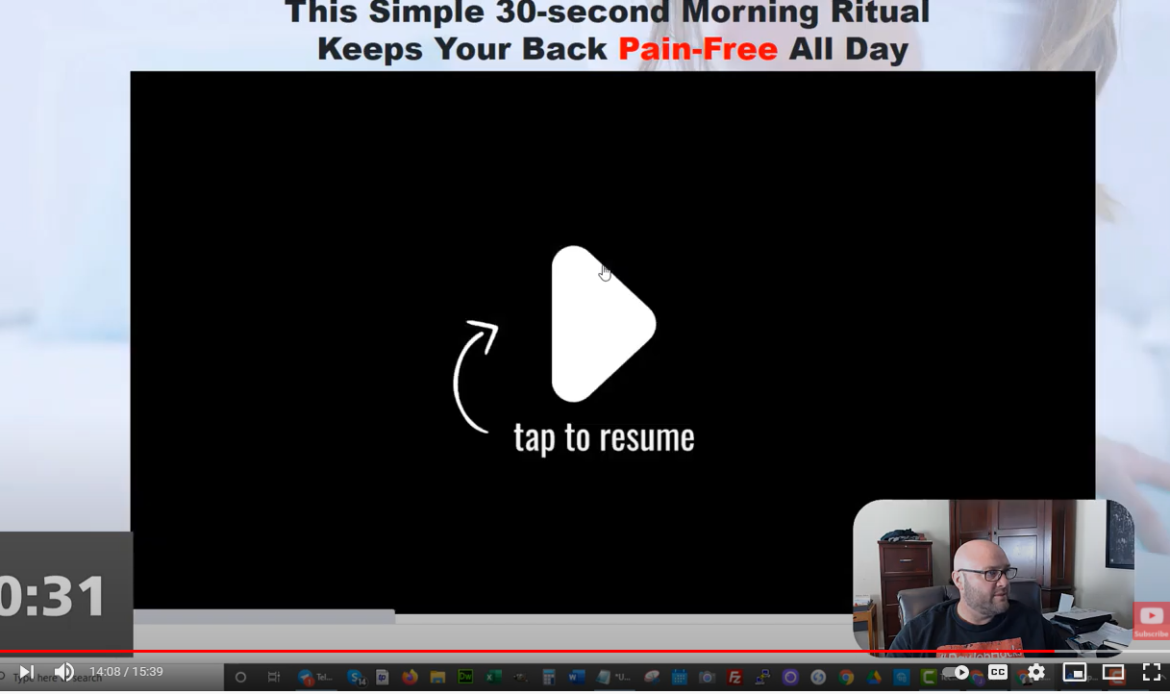
Next thing we want to do, is editing the image to show the pain relief image with that play button on it. We’re going to go back to the sales page, play the video, and find a good image that shows the product. Then, we’re going to take a screen capture. I used a screen capture tool for this; there are tons of them for free online that you can pick from.
Coming back to WordPress, we are going to click on that image and change it to the one we got from the video. Also, we can edit the headings and subtitles to fit what we’re offering. Everything in this templates is customizable, so you can also add testimonials down below, edit the logos, and so much more.
We can get the information for the headings from the main sales page as I did in this case. Find something enticing, and then we’re also going to make the colors look more like the actual sales page that we’re going to be using. This way, it looks like we’re still in the same place. In this particular case, I used a background image downloaded from Google Images.
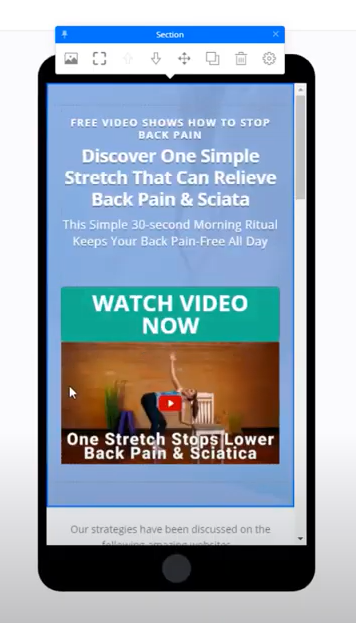
Make sure you check from the options on the top-right corner to see how the page is going to look on tablet and mobile too.
Set the Email Request Form
Now, to the most important part. We need that ‘watch video’ button, and we need to integrate the plugin so it asks people for their email when they click on it
What we want to do is edit the overlay. We can change the background color to a more suitable one too. Here is where you tell people to add their email addresses to watch the free video. Once they do, it takes them to the ClickBank offer.

Now, there’s actually one more step here. We need to integrate that with our list from AWeber. So we’re going to click on the email field, and we will select ‘opt-in form’ on the top menu. We’re going to click on the integration button from the pop-up menu and next, edit integration will open up a new pop-up menu.
From there, we select AWeber, and find the list that we’ve created. Next few steps, there are a few more options to choose from for the form fields, extra fields, GDPR settings, and finally post action. Post action is the very important part, where we redirect to our URL. This is where we’re going to be sending people after they enter their email, so we put in our ClickBank link or our tracking link if we’re using tracking.
To do this, we jump back on ClickBank, select the offer we were running with, and click ‘promote’. We put our account nickname on the pop-up window so that it tracks our affiliate link, and then we copy our ClickBank link to take it back to WordPress.
And that’s the button done, now, every time somebody enters their email, they’re going to go to that video.
After that, we want to make it so when people click the video, they go to that email form too. For that, we select show Pop-Up Overlay, and we choose the overlay we just did.
Technically now, this page is ready. We just need to add the little details, like the testimonial which we can grab from the main page. And also, change the button on the bottom to once again show the pop-up overlay.
Fifth step – Take it to the next level
What I like to do to make my squeeze more appealing is to go back and actually watch the video. It sounds funny, but by watching the video we’re promoting we can get the headlines and find the sales points to use on our own squeeze page. This way, everything is congruent too. You can even spy on ads and see what other people are doing to get inspiration.
Finally, to see what it looks like, we click the little eye on the top for the final view. We make sure everything looks the way we want to, and add an email to make sure it works. Testing everything, making sure the colors are appealing, and working on any small details is the last step.
And there we have it! Our first squeeze page. This is how I’ve been building my opt-in pages for years now, and I can guarantee it works. I send the paid traffic to these squeeze pages, and that’s how I make a lot of my money.
Now, how do we get traffic to this page?
Obviously, there are many ways to get traffic. I see this all the time on Facebook, if you’re doing it compliantly. There are also native ads, and search ads are also big.
If you want more in-depth training for traffic, I recommend joining the free training at Powerhouse Affiliate. Another option is to go and check out our traffic courses, which describe exactly how to get a ton of traffic to these ClickBank offers and build email lists at the same time.
There you have it! This is the exact method that I’ve been using for years to build my squeee pages, and it actually works very well. I send paid traffic to these pages, and if you are interested in learning more about how to get paid traffic to work for you, check out our training at Powerhouse Affiliate, where we have a complete course that teaches you everything you need to know about running profitable paid traffic compaigns.

- How to Make $1000 a Day With Google Ads Affiliate Marketing – Ultimate Guide - October 10, 2023
- Ultimate Guide to YouTube Shorts Ads for Affiliate Marketing - December 23, 2022
- How To Start Affiliate Marketing For Beginners [Ultimate Guide 2023] - December 21, 2022